Showing posts with label tuesday tutorial. Show all posts

Tuesday, June 7, 2011

The Worthy of Spaghetti Bib

or popsicles, birthday cake or baked beans! I've always wanted a bib that I could just throw over my kids' clothes and let them have at all those messy foods that make me cringe! My little ones aren't the daintiest eaters in the world and I'm slightly particular about keeping their clothes clean! Maybe I'm odd that way...., but in case I'm not alone, I came up with a tutorial for making:

The Worthy of Spaghetti Bib

I could have made this bib out of PUL or a similar waterproof material, but I really wanted a bib that could absorb some of the spills that happen instead of letting it run onto their pants! So the outer layer of this bib is an old t-shirt and the lining is bamboo french terry. Another t-shirt, a sweatshirt, or a cotton french terry shirt would have worked for the lining too. Not only does this bib have sleeves, it has a back because my kids can get food in the weirdest places! :)


Using the pattern I drafted for Josiah's Romper, I cut out the sleeves, making them long instead.
I cut out the front on the fold, folding the leg of the romper out of the way to make it a long shirt length.
Then, I cut out the back, not on the fold, adding an extra inch or so for the back to overlap.
Next, I cut matching pieces out of the lining.
Now's a good time to add an applique to the front!
I appliqued a fork and spoon, because, well, you know.... it fits the theme! :)
With right sides together, I serged across the bottom only of the front piece and matching lining. Then turned it right side out and pressed it.
On the two back pieces, matching the pieces to their linings, right sides together, I serged the longer straight edges and bottoms. Then, turned them right side out and pressed them too.
Taking the sleeves with their matching linings, I sewed the sleeves onto the front and back pieces at the shoulder seams.
I cut some pieces from the same shirt to be the ribbing for the cuffs and neck. I cut one piece 12" by 2" and two pieces 6" by 2 ".
I folded the cuff ribbing, wrong sides together, in half and sewed it to the edge of the sleeve, stretching to fit.
I folded the neck ribbing in half the long way, right sides together, and serged the ends to finish them. Then turned it right side out,
and sewed it to the neck opening, right sides together, matching the cut edges and lining up the finished edges, stretching to fit.
Next, I sewed up the side seams, from bottom to sleeve cuff, on both sides.
Then added some red snaps to match the applique. I only put snaps part way down to make it easier to put on and off.
The back
and the front.

Time to try it out!
All those dribbles and his clothes are totally safe!

So, how did it work? Well, after I took these pictures, I gave Josiah some raspberries which I found shoved down inside his chair when I cleaned him up. (Apparently not one of his favorites!) But his clothes? Perfectly clean! Yay!

Linking up here.

Tuesday, May 31, 2011

Tutorial Tuesday

Even though it's raining again today, I'm sure summer will be here soon! I decided to try making a romper for Josiah, and I'm really happy with how it turned out!
It was really easy to make, so I thought I would share the tutorial! Sorry if it's kinda picture heavy! :)

I wanted a raglan style for his romper, although a regular t-shirt style would have been just as cute! A great place to find the raglan style is to trace is a blanket sleeper!
I folded the sleeper in half and folded the sleeve out of the way to trace the neck and where the sleeve attaches.
I added seam allowance and drew the front neckline too.
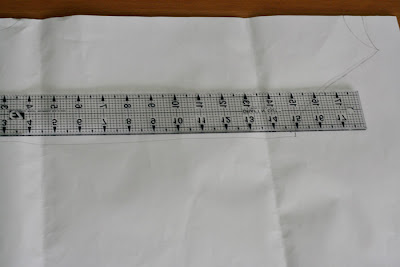
I used a ruler to draw a straight line down from the shoulder seam.
Using either the blanket sleeper or an exisiting piece of clothing that fits (or measure your kiddo. Yeah, right...... haha!), match up the neckline and folded edge and draw the curve for inside the legs where the snaps are.
Then decide on the length of the legs and draw a straight line across.
Next, trace the sleeve edge where it attaches to the body. I usually mark the edge of the sleeve and fold my sleeve pattern along this line to trace the other side. It's easier than trying to flip the sleeve over, and you want both sides of the sleeve to be identical.
Add seam allowance and draw a straight line across at the length you want the sleeves to be.
Here's what my pattern pieces look like!
I used an old t-shirt for my romper, folding it down the front and back to cut out the pieces. I lined up the bottom edges of the romper and sleeves with the finished edges of the shirts to take advantage of the hems.
Here's the romper and sleeves cut out. (Front with lower neckline)

I cut out a gusset piece, following the lines of the curve of the back romper piece. I don't know how necessary this is for a disposable wearing baby, but my little guy is cloth diapered, so I figured it would help get the romper snapped over his fluffy bum! :)

With right sides together, I sewed the gusset onto the back piece.

I sewed three of the four seams to attach the sleeves, right sides together.

I measured half the neckline and doubled it. Mine was 15".Since I didn't have ribbing the right color, I just cut a strip out of the blue shirt to put around the neck. My blue shirt wasn't very stretchy so I made it longer than I would have cut from a stretchy one. My piece was about 13" by 2 1/2".

After folding the piece in half, wrong sides together, I sewed it to the neckline, stretching to fit.
I sewed up the last sleeve seam to finish the top of the romper!
Now is the easiest time to add an applique. I sewed on an airplane!
I cut some long strips from my old t-shirt, 2" tall. Since this shirt is quite stretchy both ways, I cut them to take advantage of the hemmed edge on one side.
I folded one of the strips in half, wrong sides together, and lined up the hem with the right side of the hemmed inside leg edge of the back of the romper. Then I sewed the strip to the inner leg and around the gusset.
I stopped before I got to the end of the leg, cut off all of the extra strip except for an inch and folded it to the inside, matching the folded edge to the leg edge, before continuing to sew the rest of the strip on. This gave it a finished look at both ends.
This is what it looked like when sewn on.
I used the other strip and sewed it across the front of the romper snap area. I used the hem on one side and then folded the extra in on the other side.
I folded the strip to the inside to the seam and then folded it again so the seam was at the edge.
I topstitched the edge of the strip down with a slight zig-zag to allow some stretch.
Then, I sewed up the side seams,
and added snaps!
Josiah's romper finished!

Now to try to get him to model! :)
He was more interested in his sock! :)
Or the fireplace....
Or his sister's school supplies...
Or throwing his sock! :)

Oh well, it fits great and is obviously comfortable enough in any pose! :) Thanks for looking!

Related Posts Plugin for WordPress, Blogger...